Lesson
Sending Webhooks
Webhooks are one-way messages sent from Braze to another system. Webhooks in Braze are sent in the same way as any other channel, either as part of a campaign or a Canvas message step. To send a successful webhook, you’ll need to correctly format the message.
Before sending any webhooks, make sure you’re familiar with the documentation for the destination API. It should help you understand the correct URL to use, the right format for the request body, and any headers you’ll need to include.
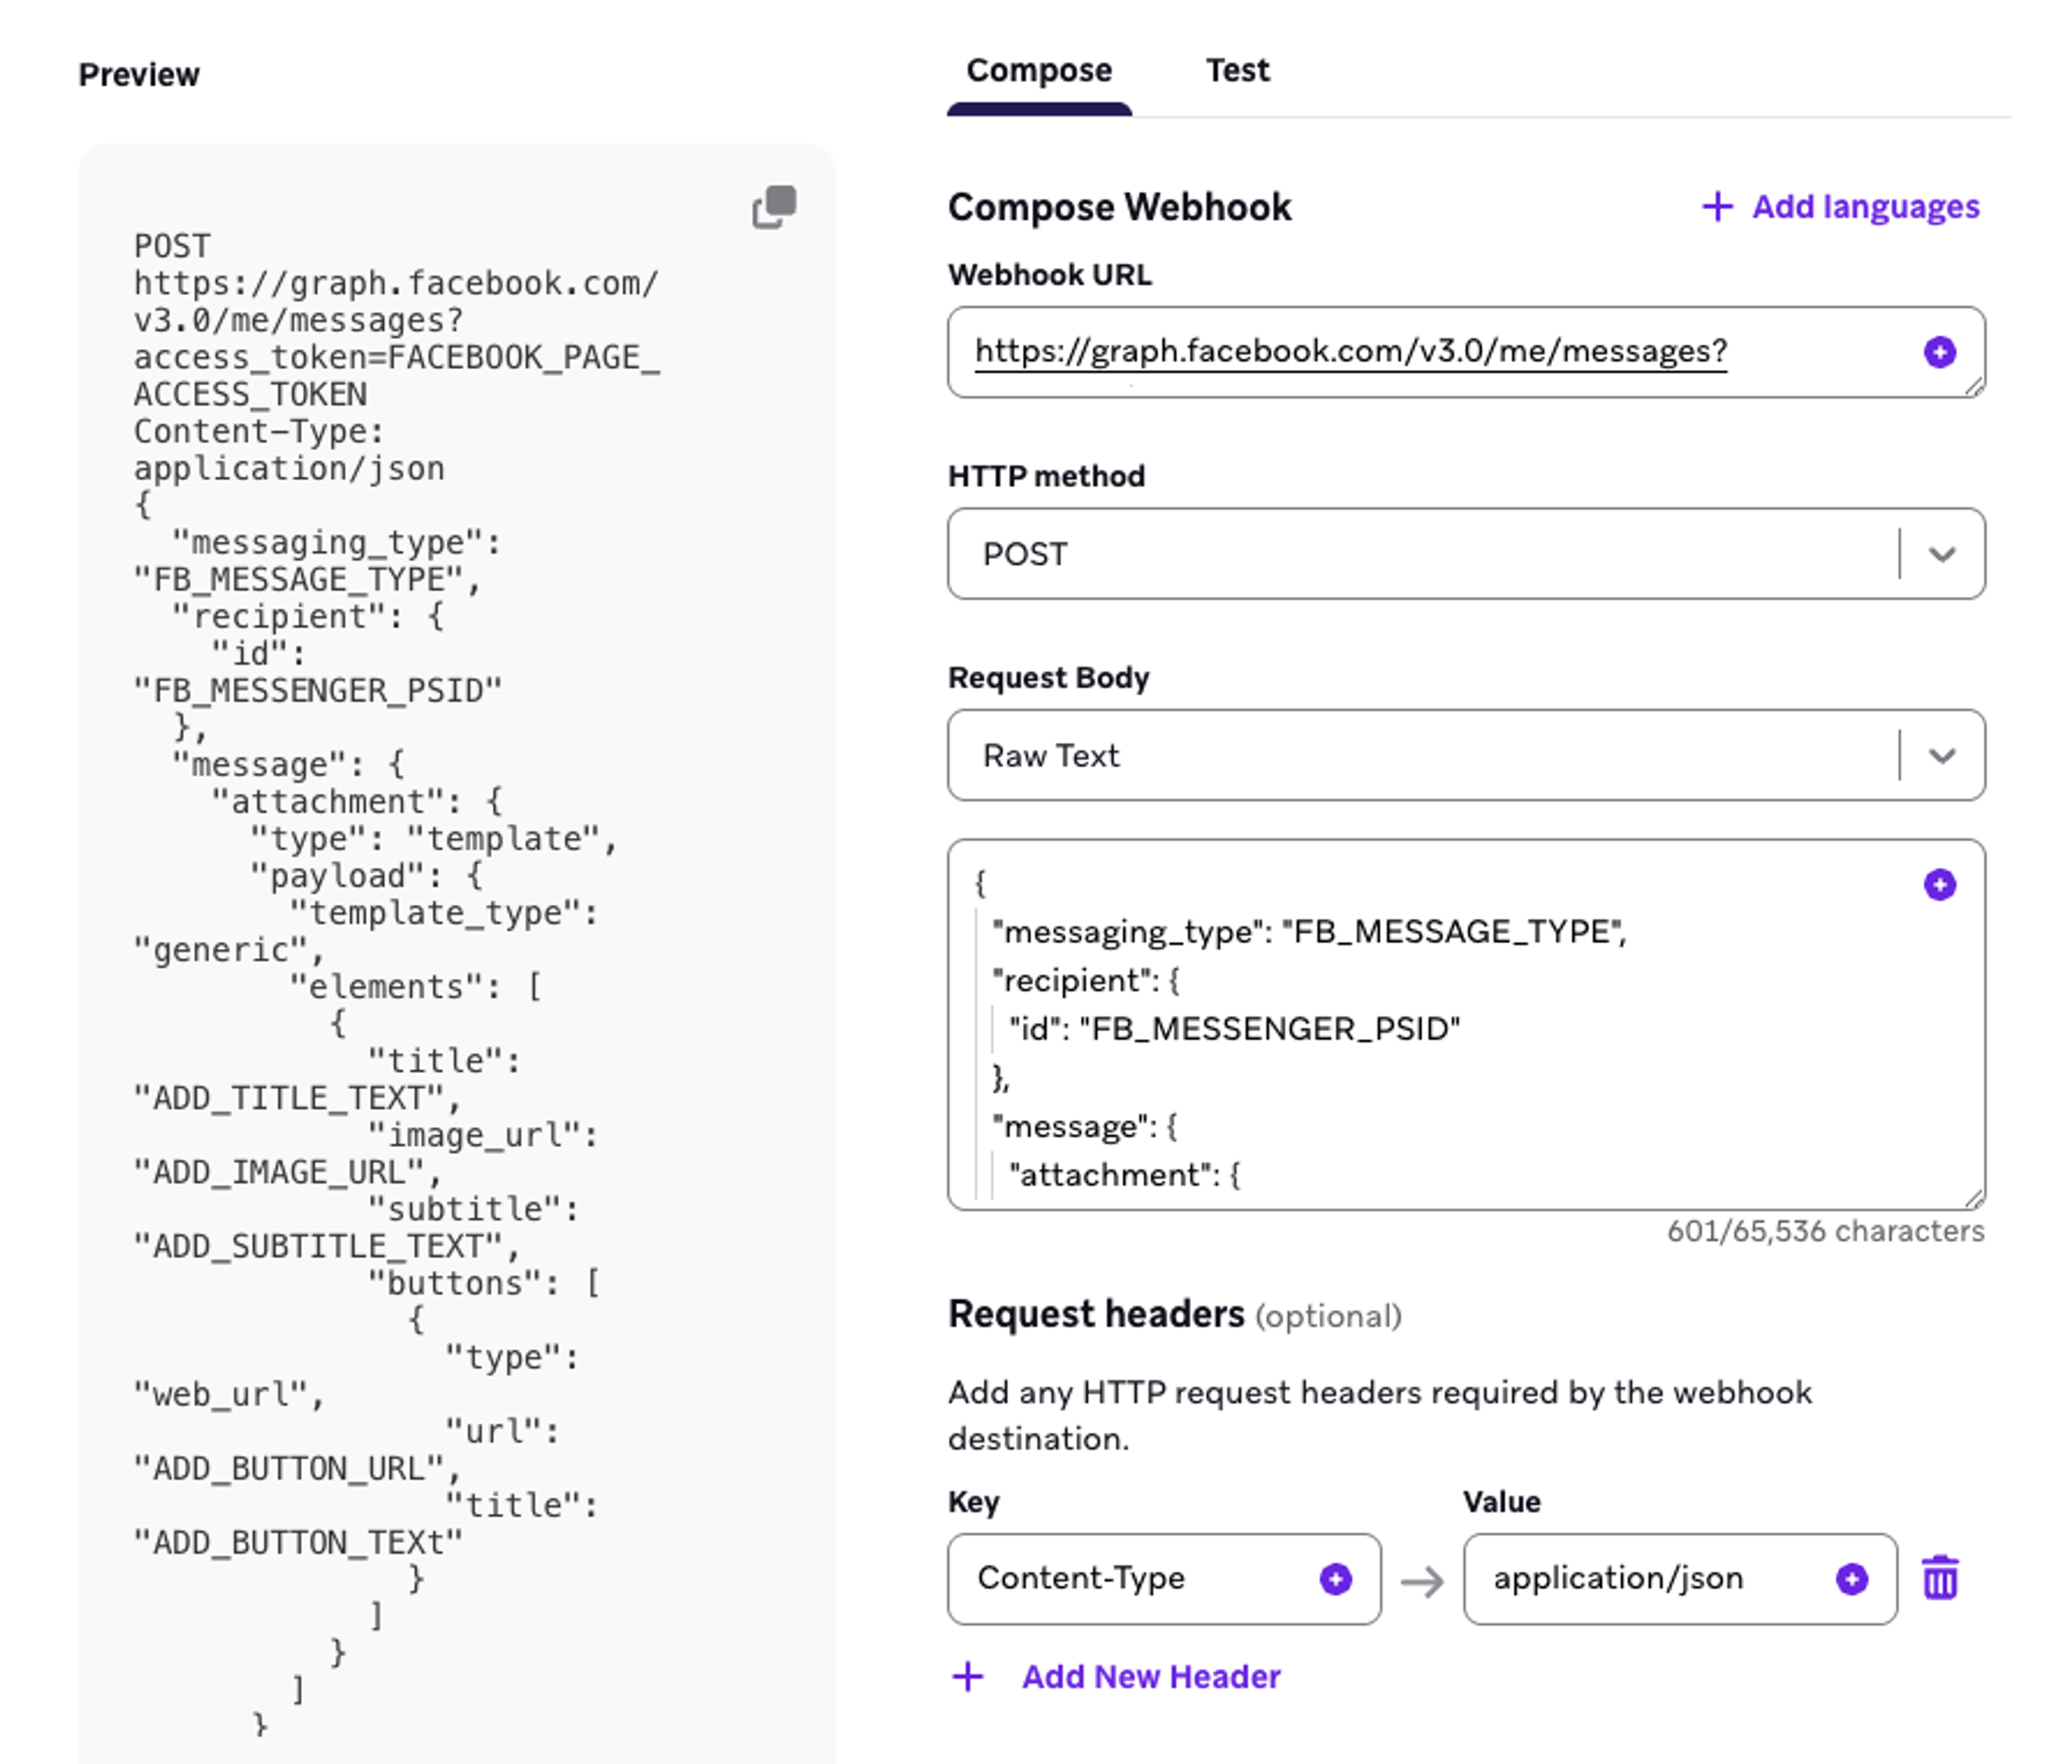
Anatomy of a Braze webhook message
Explore the structure of a webhook message in the following interactive image:
Endpoint URLs
The API endpoint that you’re using will define the appropriate URL for your webhook to connect to.
Some APIs encode significant information within the URL. This is typically done with query strings, which are key-value pairs that can be added to a URL.
Query strings come after the main URL, separated by a question mark ? character. Then, keys and values are separated by an equals sign =, and each individual pair of key-value is separated by an & ampersand character.
In the URL for a weather API in the image below, the query string includes a variety of information: the authorization code, which city a forecast is being requested for, and how many days worth of weather should be returned. These are encoded as three key-value pairs:
auth_key= 123abccity= new_yorkforecast_days= 4

The API documentation for this URL will tell you which keys are available, and what types of values they expect.
Request Body
Most APIs you’ll send to expect to receive data in JSON (JavaScript Object Notation), a text-based format for exchanging data. JSON is organized into key-value pairs enclosed in curly brackets { }. The key is usually a predefined type of data that is accepted by the endpoint, like username or order_number. The values are usually the data that changes per user or request, like an individual username or order number.
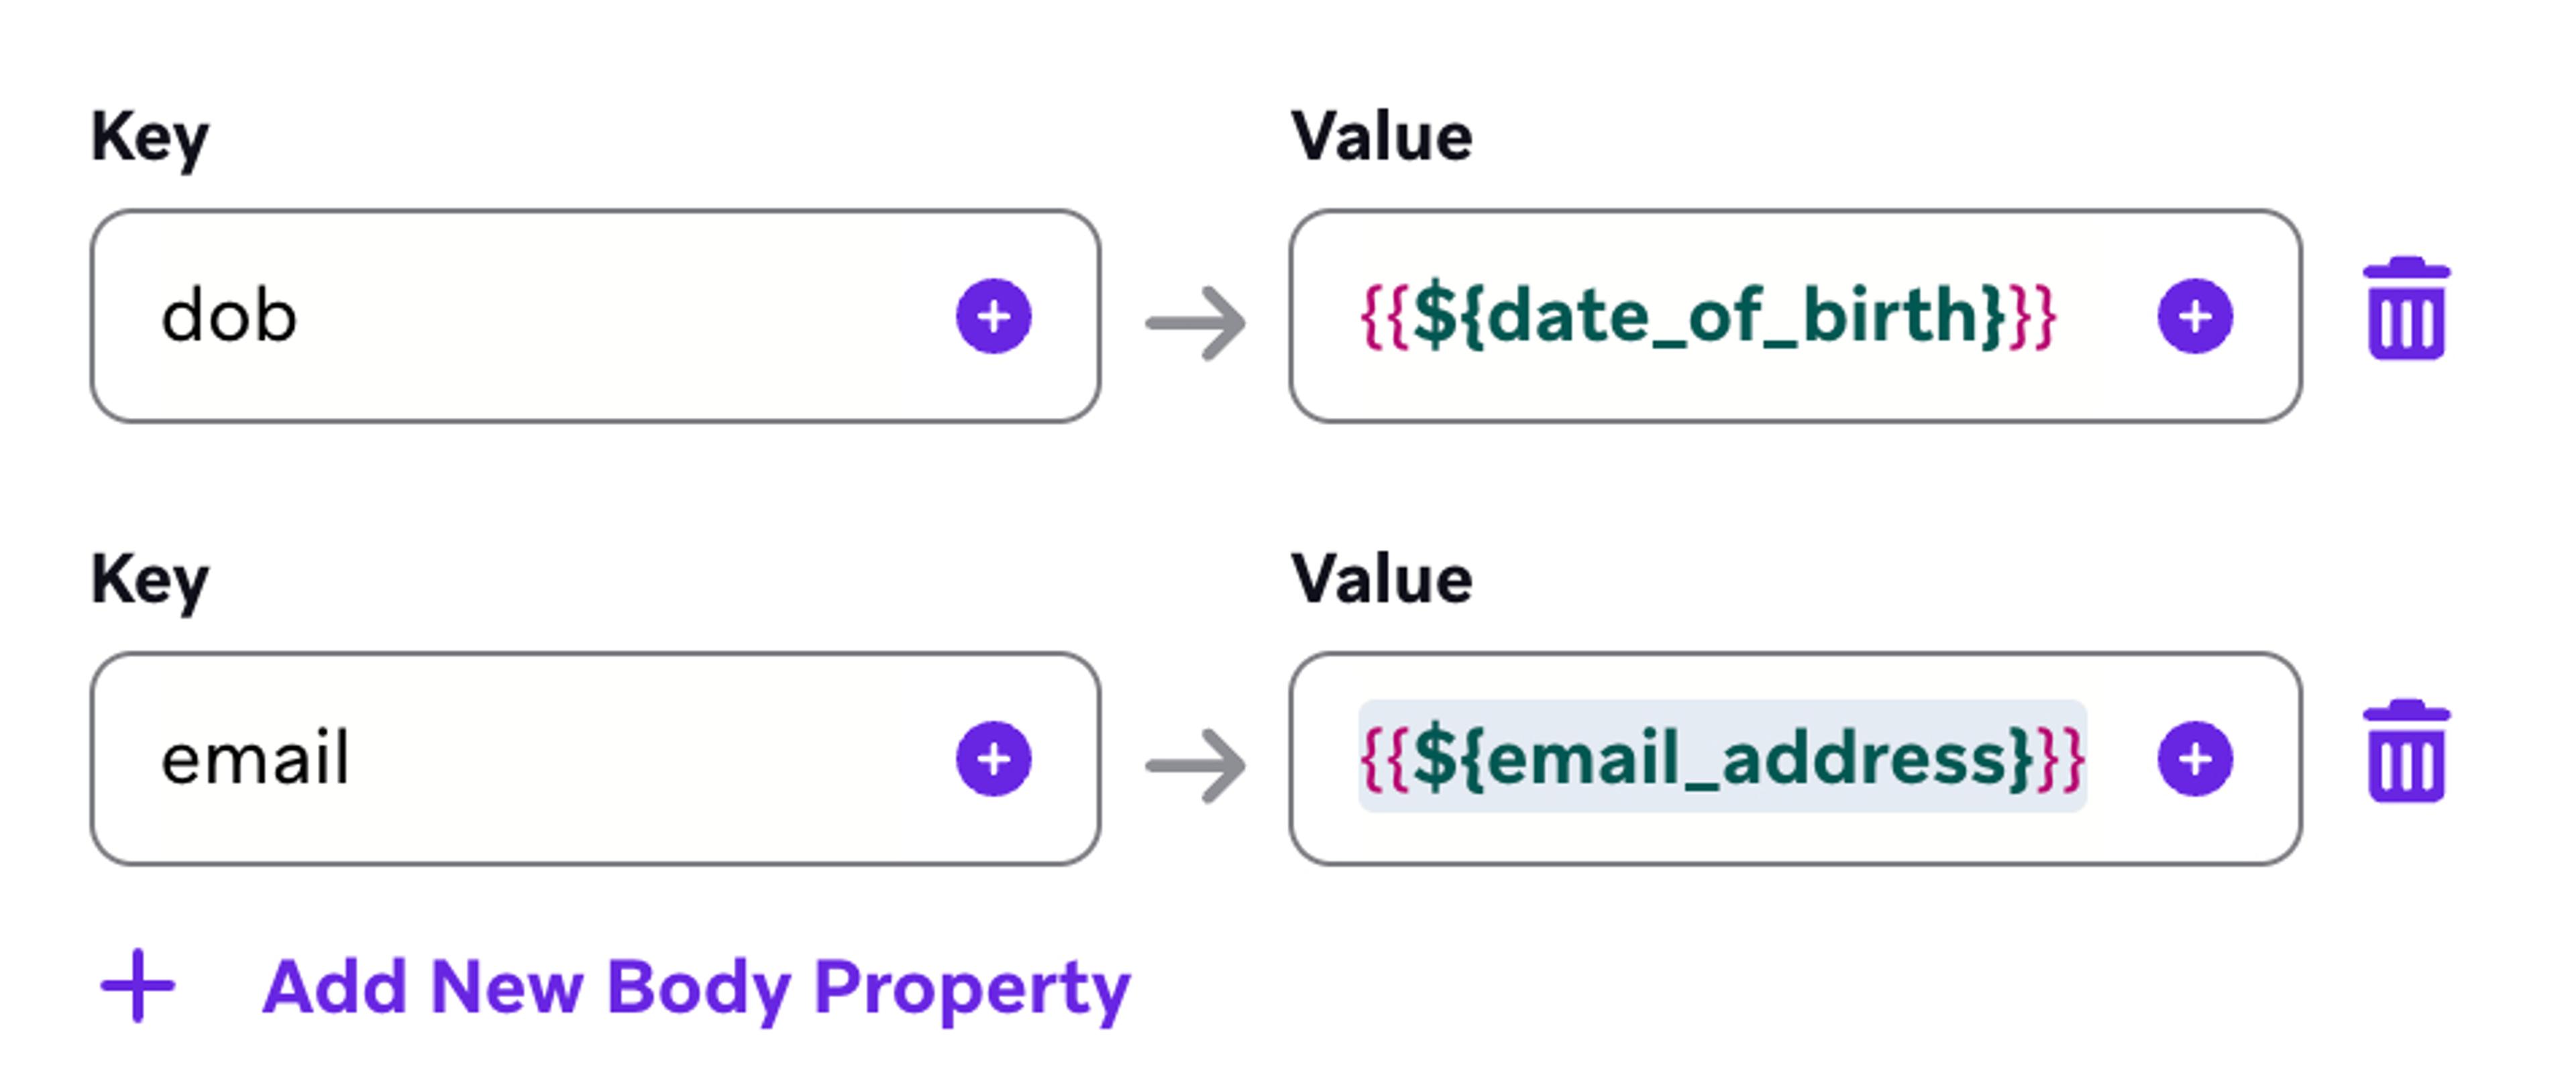
There are two ways to build the JSON in Braze. You can build your request body using the key-value pair editor, or using the raw text option.
The key-value pair editor can reduce mistakes, but it only supports string values. You can’t easily use it to send numerical or boolean values. If you’re sending a simple body, the key-value editor is the best option. Like the rest of the editor, you can insert Liquid as either a key or a value.
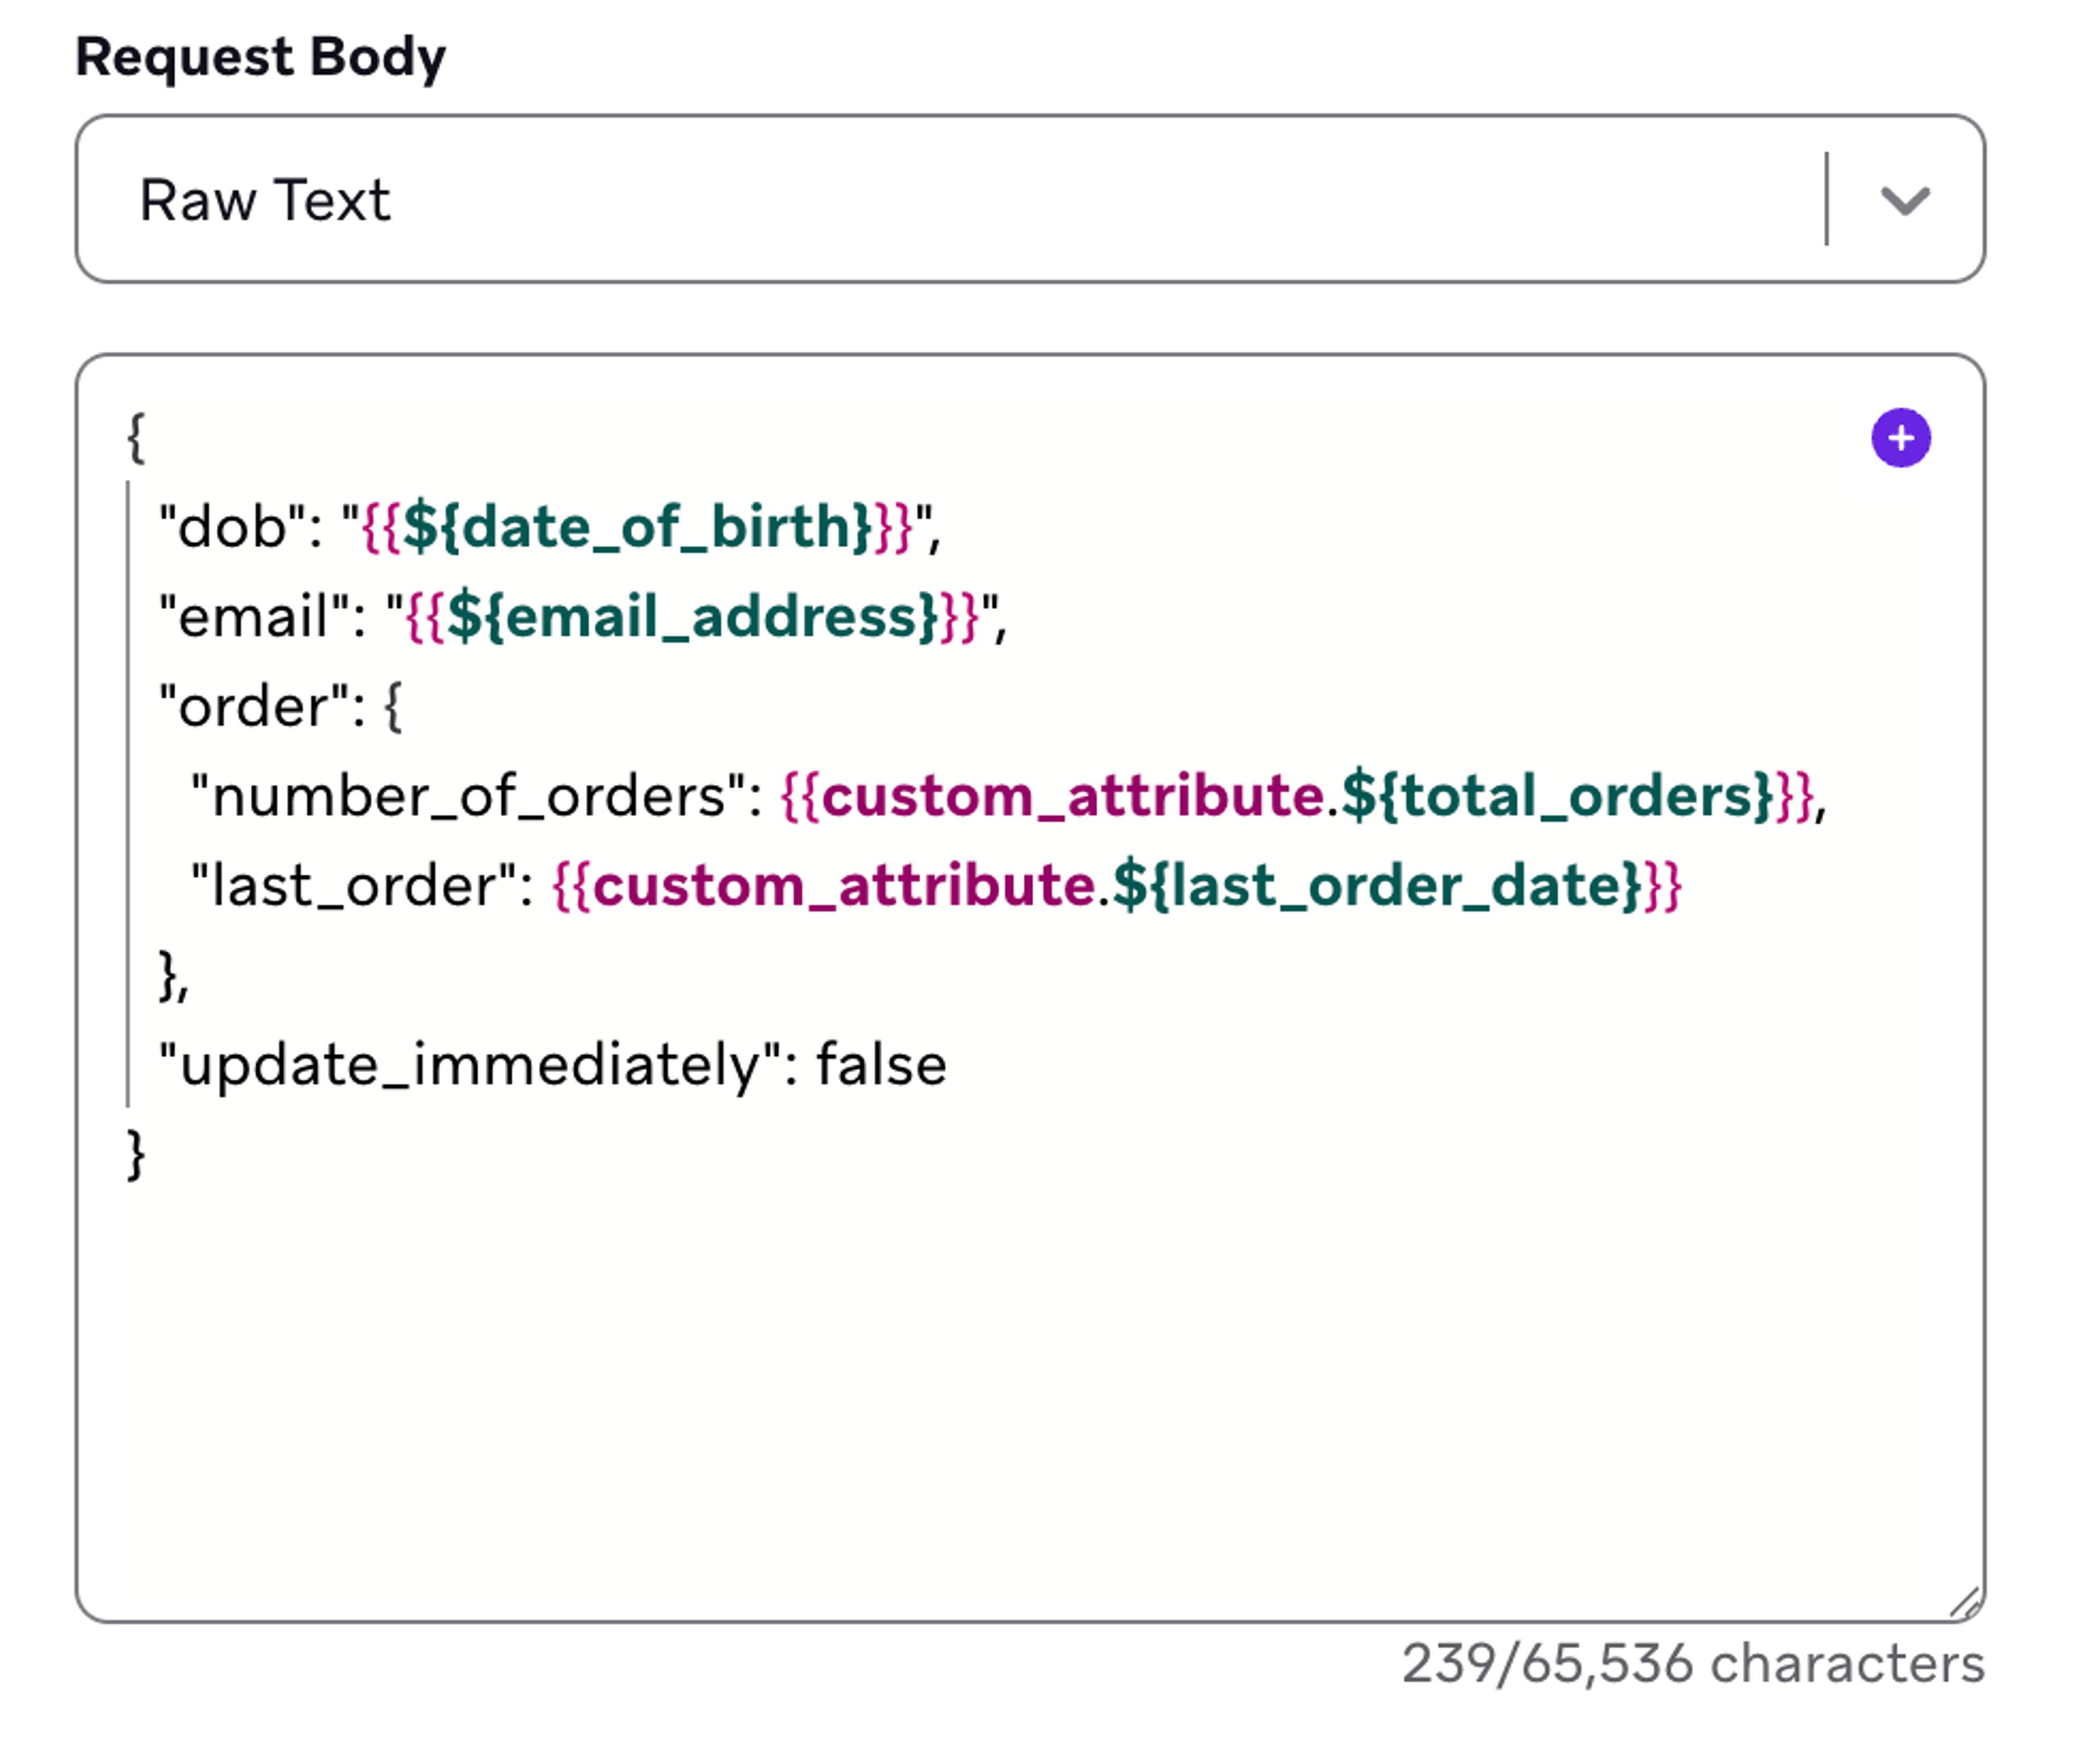
The raw text editor is more customizable, but requires more attention to detail, and a basic understanding of JSON. The raw text editor makes it easier to format data with different data types. If your data needs nested objects, like an order object with several different nested values, you’ll need to use the raw editor.
BrazeAI™ Operator can make it much easier to write and check your JSON. You can ask it to compose the JSON itself, or have it validate that your JSON is correct.
JSON Basics
If you’re unfamiliar with JSON notation, you can read this brief explanation. If you are familiar with JSON, you can skip it and move to the next section
JSON Basics
JavaScript Object Notation (JSON) is one of the most common ways to format and exchange data between APIs. It is a structured way to format data based on keys, which label the data, and values, which are the data itself.
The JSON you’ll see in webhooks is normally enclosed in a top-level set of curly braces { }. Everything enclosed by the braces is called a JSON object. Within this object, you’ll see keys and values. Keys are a label, so they are always strings. Values can be a variety of different types of data. You will need to make sure that your data is formatted in exactly the correct format that your endpoint expects, so read the documentation carefully.
- Keys
Must be a string enclosed in double quotes (“email"). - Values
- Strings: Any combination of letters and numbers. Must be enclosed in double quotes (
“Alex C”) - Numbers: Whole numbers or integers with a period as a decimal separation. Do not use quotes (
22) - Boolean: True or false, that must be either
trueorfalse - Array: A set of values, enclosed in square brackets. The values can be any type, but these must follow the rules of that type (
["strawberry", "cherry", "lime"]) - Objects: Another set of key-value pairs, enclosed with
{}. This is often called “nesting” since you now have one object inside of another.
- Strings: Any combination of letters and numbers. Must be enclosed in double quotes (
- Separators
- Keys and values are separated by a colon
: - Key-value pairs are separated by commas
,
- Keys and values are separated by a colon
You should make sure that for every open bracket or quotation mark, there is a closing bracket or another quotation mark. You should also be careful not to put a comma after the last key-value pair in your JSON, just like when writing a sentence—you wouldn’t put a comma after the last item in a list.
In the following example JSON, you can see a variety of different data types:
{
"name": "Alex C",
"age": 22,
"city": "Houston",
"is_subscribed": true,
"favorites" : ["strawberry", "cherry", "lime"],
"location" : {
"state": "AZ",
"city" : "Phoenix"
}
}
Authorization and Headers
Most APIs will only accept authorized requests to ensure that only authorized users are retrieving data from their service.
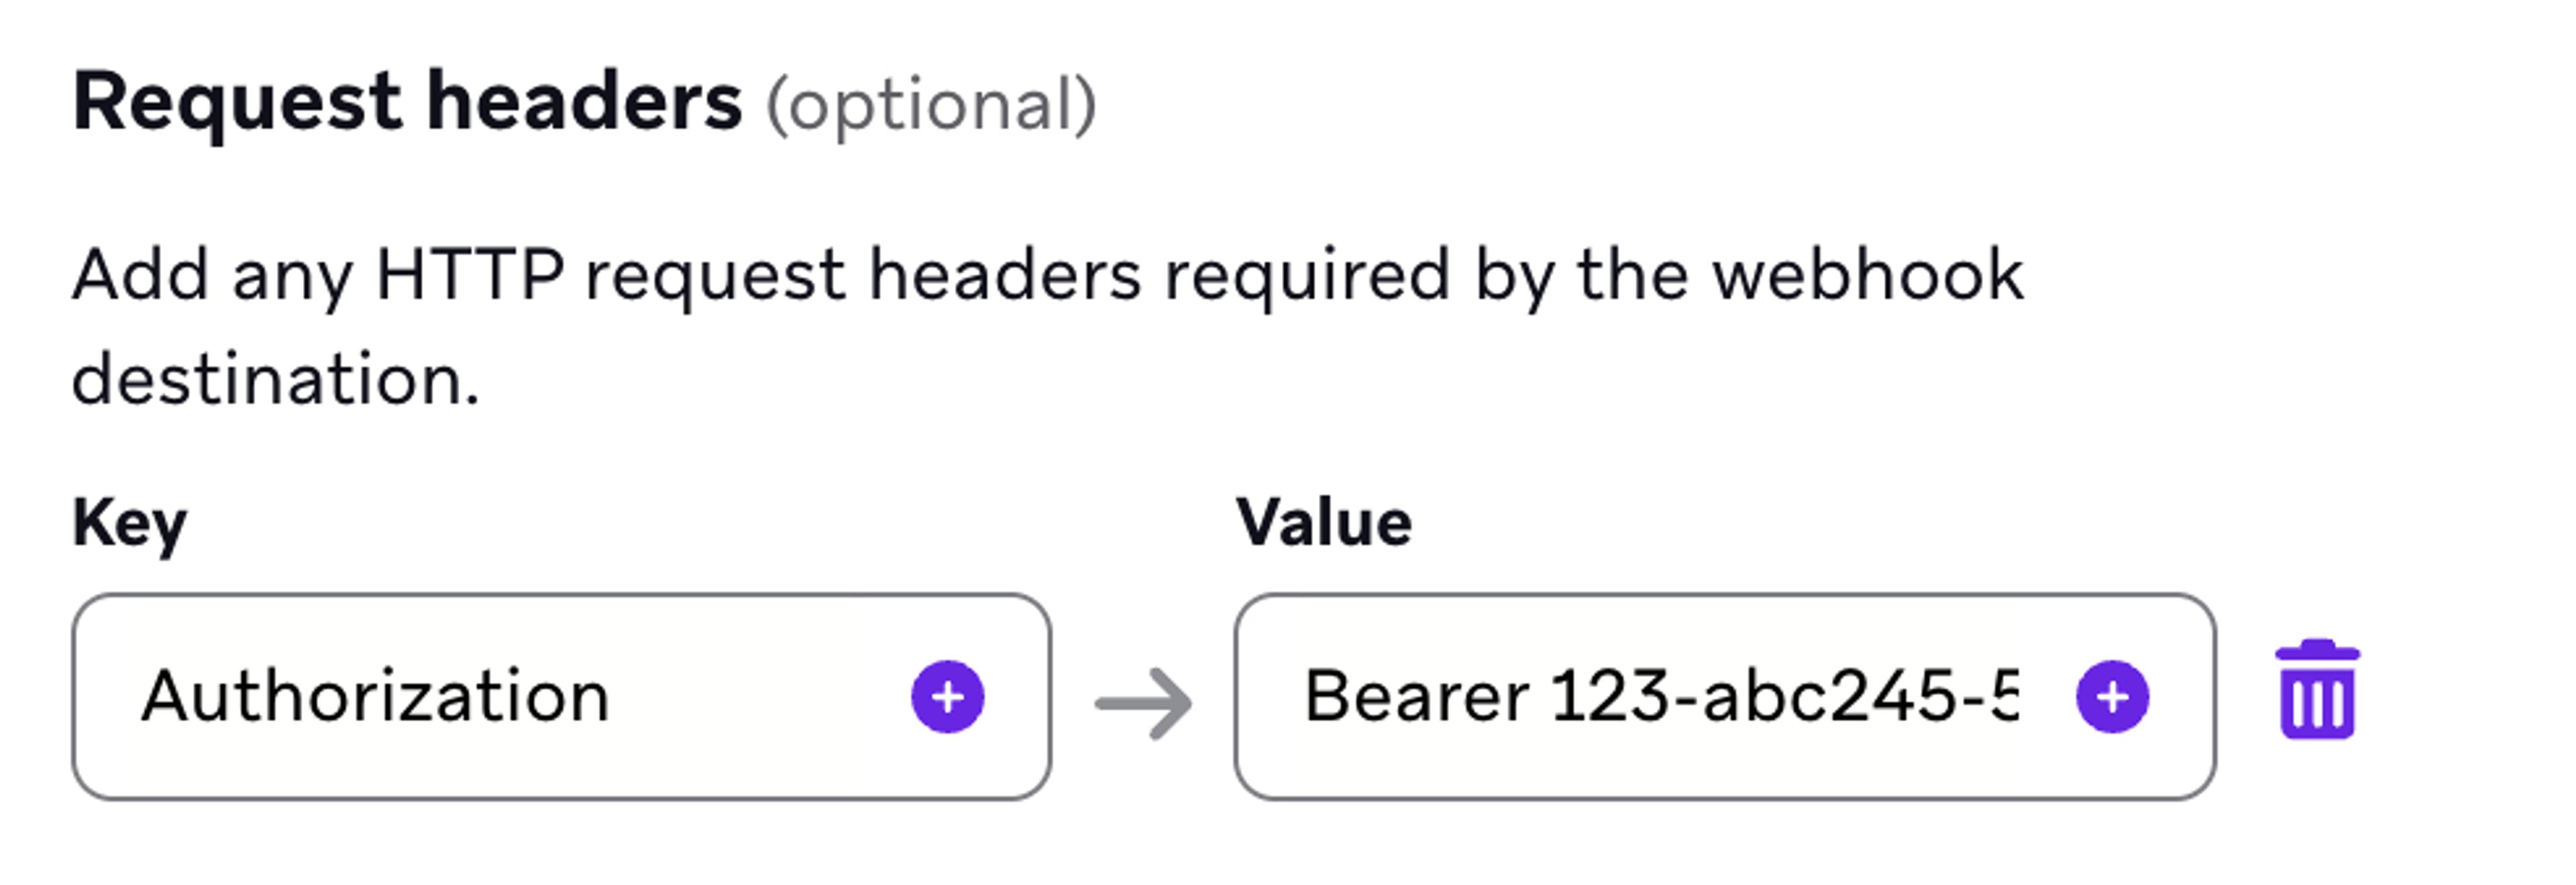
You normally include your authorization information in the API request header. For example, most requests to the Braze API require an authorization header in the following format:
Authorization: Bearer 1234-abc567-890-321The final part, the alphanumeric code, is your authorization key, which you can find in the Braze dashboard.
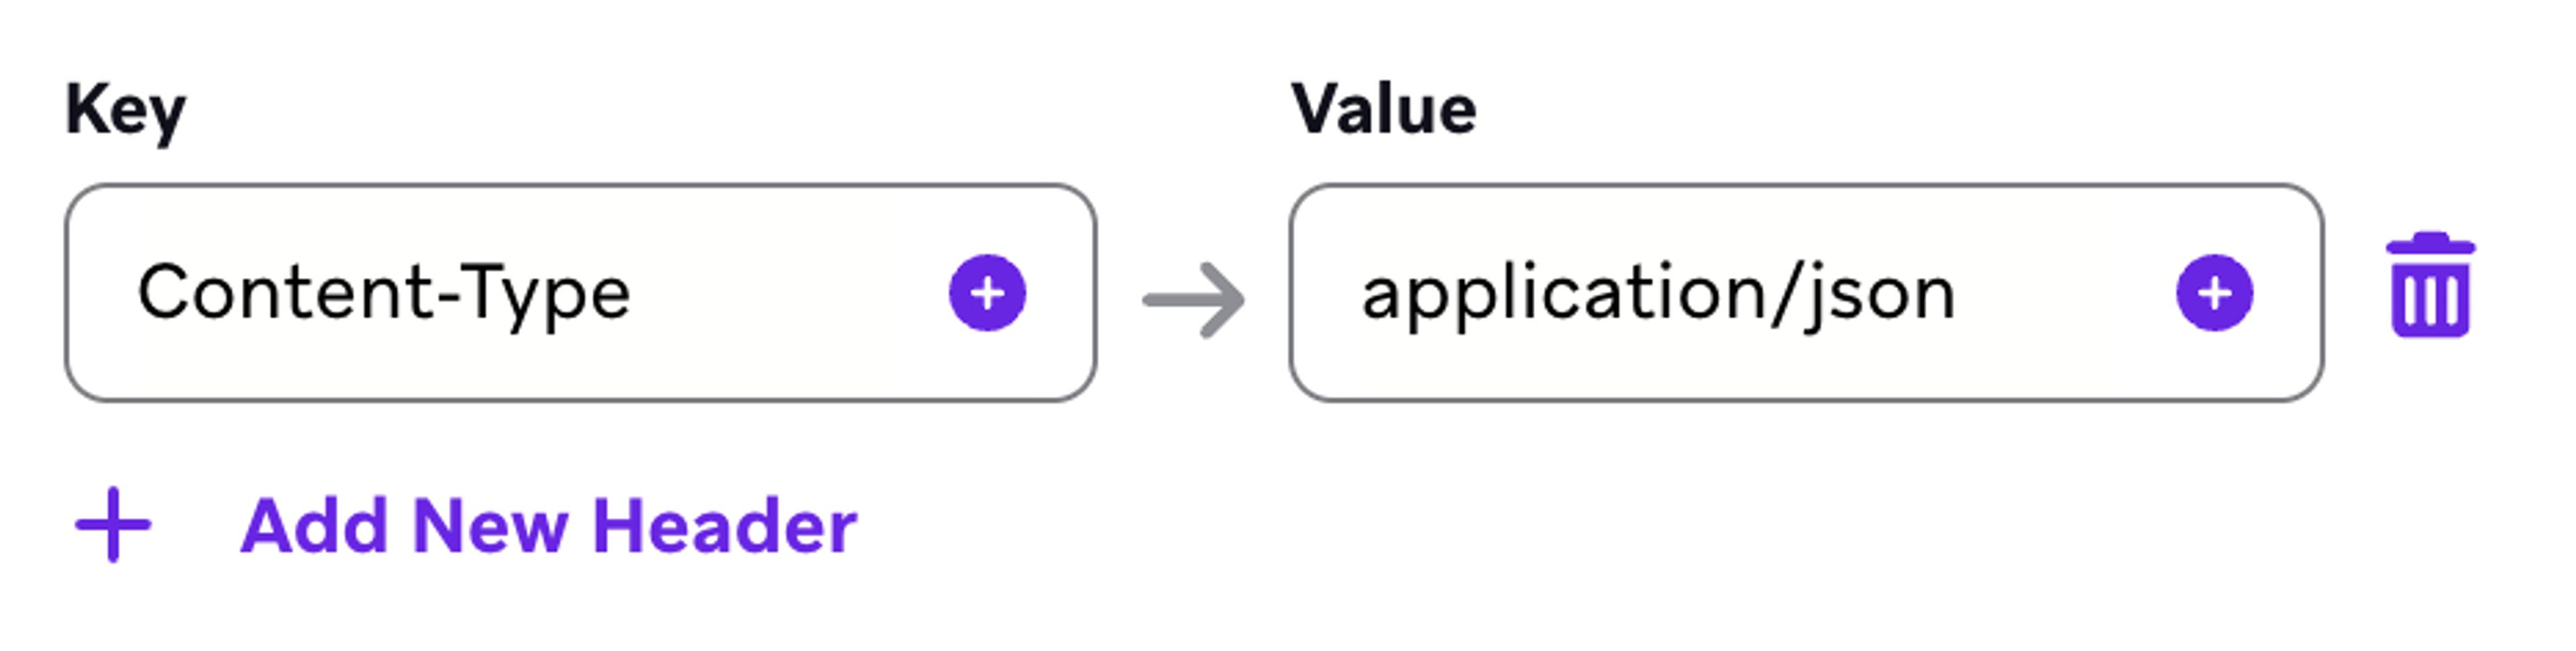
To put this style of authorization into your webhook message, you place “Authorization” in the Key field, and then “Bearer” followed by your API code in the Value field.
Many APIs also require you to specify the type of content you’re sending them. In most cases, this is the following key-value pair, which also should be included in the composer:
Liquid in Webhook Messages
You can place Liquid in almost every part of the webhook composer. You’re usually sending one webhook per user in your campaign or Canvas, and so Liquid allows you to include personalized user details within your webhook.
You can add Liquid anywhere you see the Add Personalization icon within a text field.
Personalizing Webhook URLs
You can include personalization in the URL field of the composer. This is common when working with APIs where the request is largely communicated via the URL. For example, if you had an API to unsubscribe users from messaging within your larger tech ecosystem, you’d want to include their user identifier in the webhook URL:
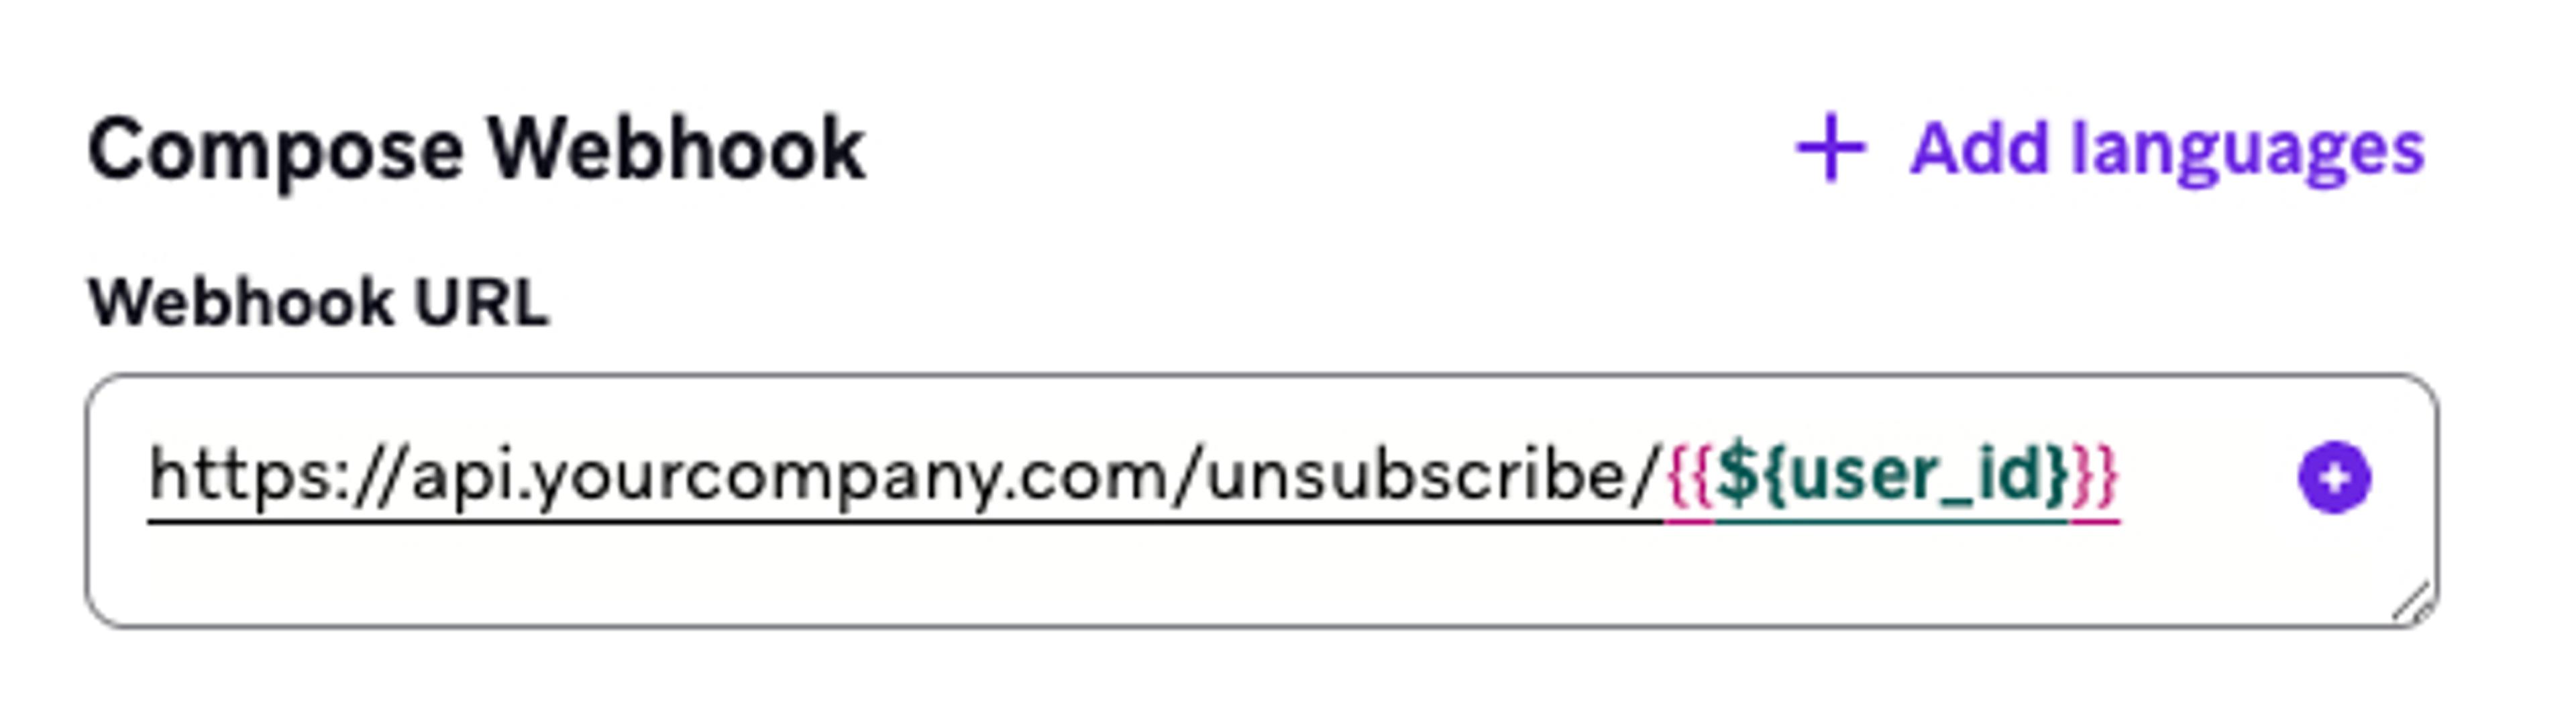
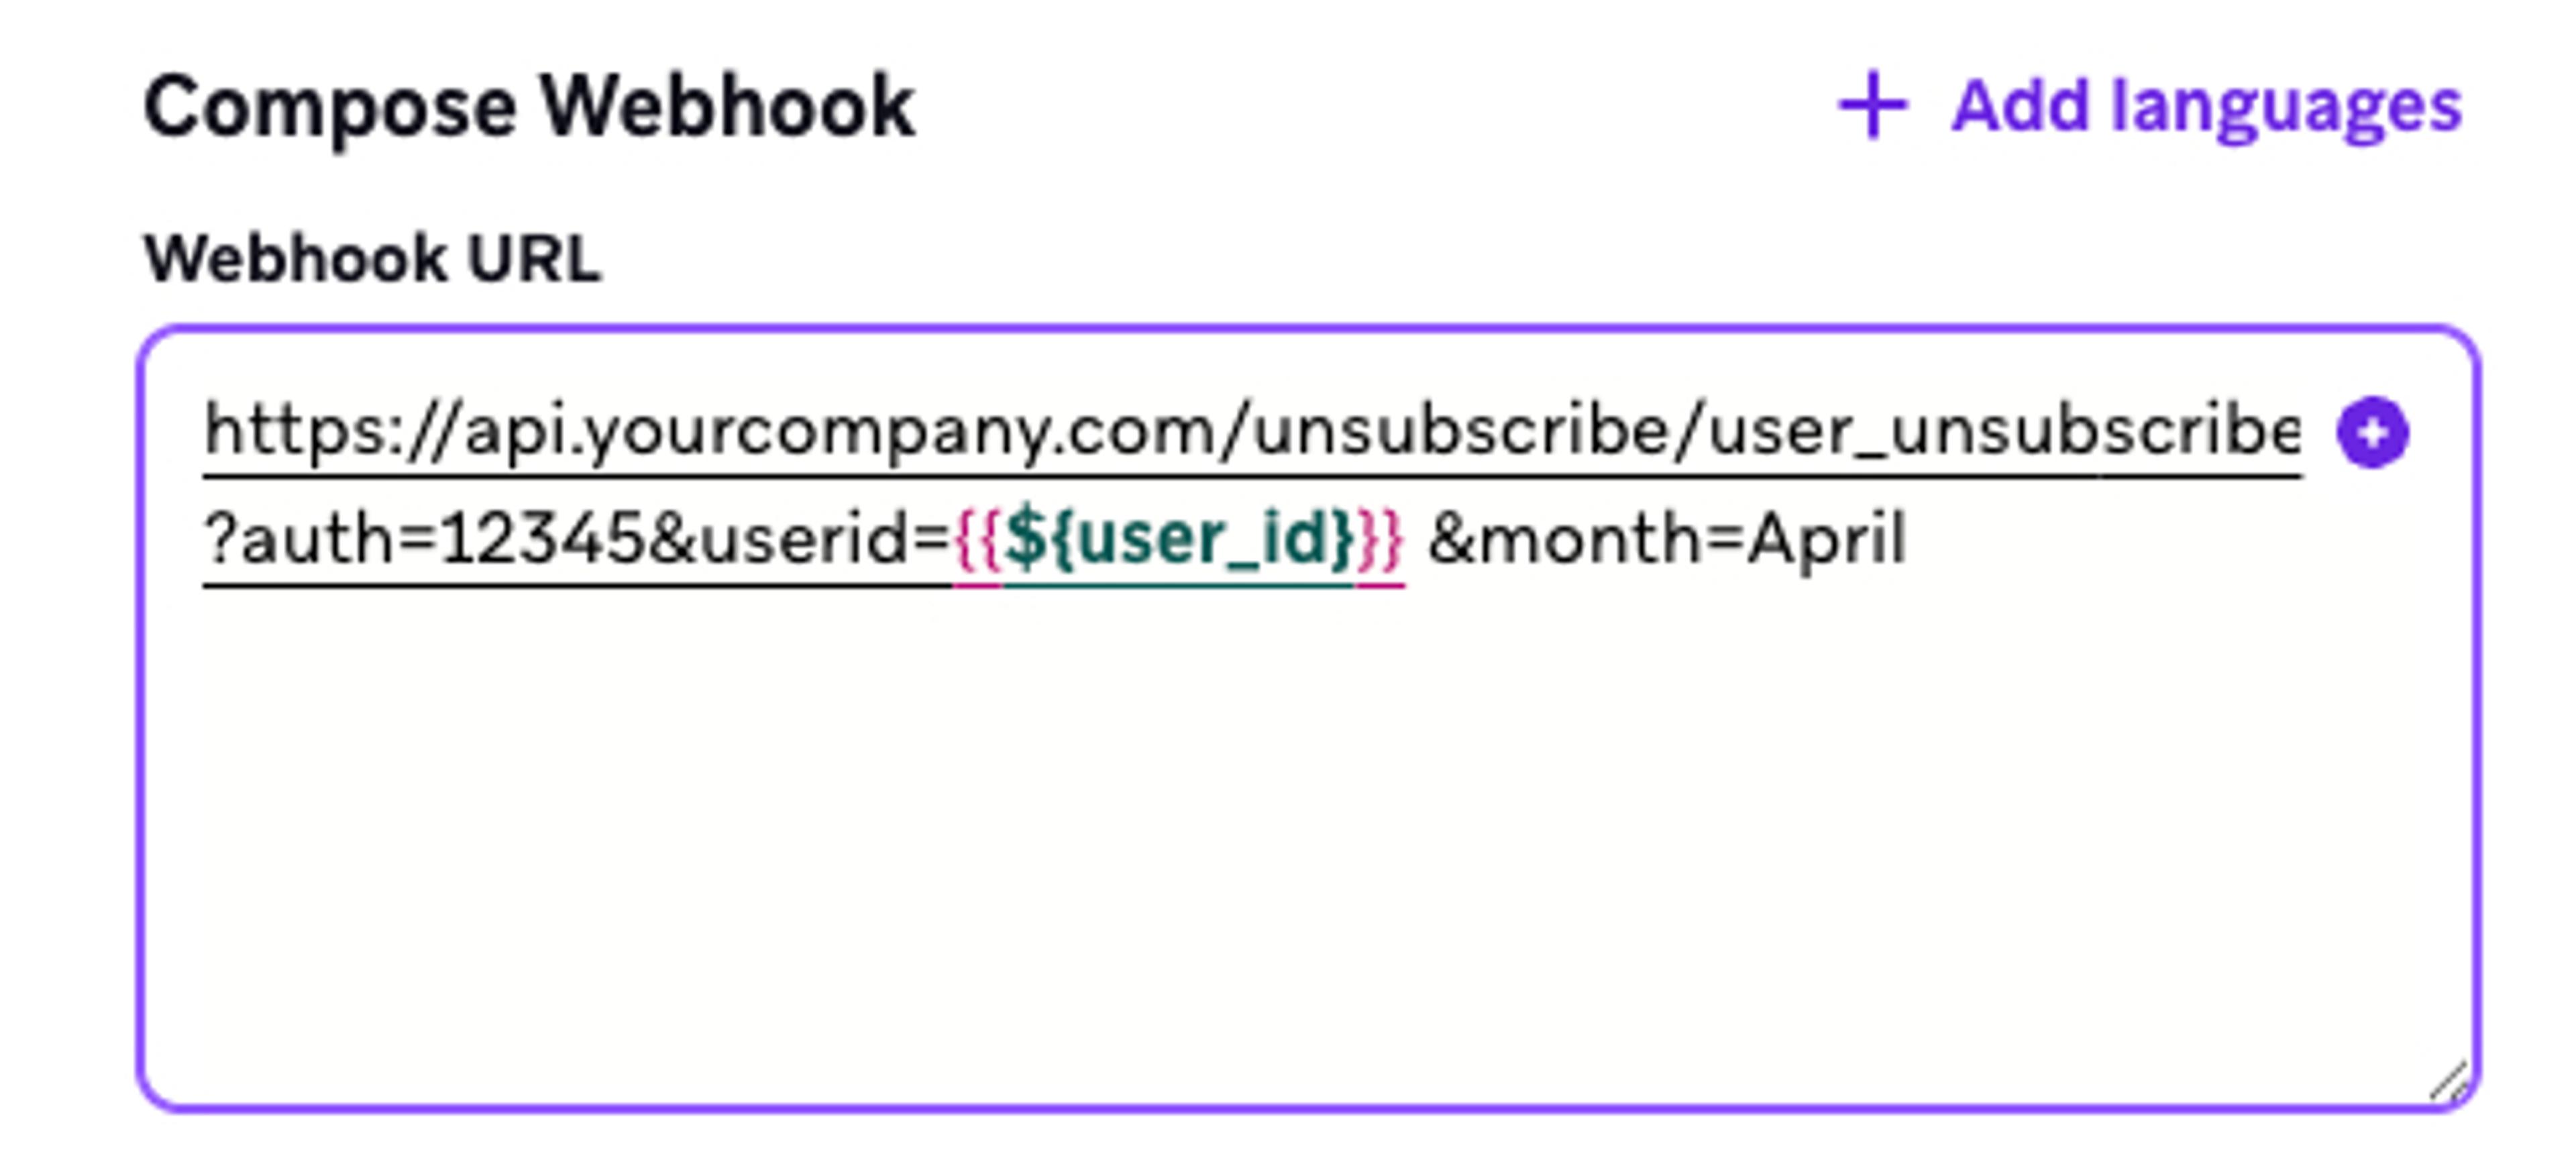
When composing a URL, be careful not to introduce whitespace into the URL by placing spaces before or after the Liquid. Pay attention to how the URL is underlined to notice where there might be extraneous whitespace. In the following image, a space was accidentally introduced, which would cause the webhook to fail.
It is possible that your data entered by your users might add extra whitespace into the data. For example, when a user enters their name, they might accidentally include an extra space: Julia instead of just Julia. You can use the Liquid strip filter to remove extra whitespace if you are concerned this might be an issue in your data:
https://api.yourcompany.com/unsubscribe/user_unsubscribe?first_name={{${first_name}|strip}}Personalizing the Webhook Body
For webhooks which put most of their data into the webhook body, you can include personal data with Liquid. For example, if you’re sending a direct mail message, you’d need to include the user’s name and address using Liquid code:
"to": {
    "name": "{{${first_name}}} {{${last_name}}}",
    "address_line1": "{{custom_attribute.${address_line1}}}",
    "address_city": "{{custom_attribute.${address_city}}}",
    "address_zip": "{{custom_attribute.${address_zip}}}",
    "address_country": "{{custom_attribute.${address_country}}}"
}
As with the rest of the webhook composer, you can insert this data by clicking the personalization button and choosing the appropriate items to insert into your message.
Avoiding Common Mistakes
If you’re planning to write your own JSON webhook bodies, read the following section for how to avoid causing JSON errors when using Liquid. Otherwise, you can skip this section.
Avoiding Liquid & JSON Mistakes
You need to make sure your body is still in correct JSON format. It’s easy to accidentally cut-and-paste your Liquid into the wrong part of a message. For example, the following would produce an invalid result:
"address_zip": ""{{custom_attribute.${address_zip}}},
Once the Liquid renders, it would produce the invalid code "address_zip": ""55400, with the zip code outside the quotes.
Similarly, make sure your string values are properly enclosed in quotes, while your numbers and booleans are not. The following example is correct, only the city name should have quotes around it:
"age": {{custom_attribute.${age}}},
"city": "{{custom_attribute.${address_city}}}",
"is_subscribed": {{custom_attribute.${sub_status}}}
Be careful where you put your quotes when you have multiple values. In the following example, there is a single set of quotes around the person’s name, which is correct. If there were quotes around each liquid item, "{{${first_name}}}” “{{${last_name}}}", this would produce invalid JSON and make the webhook fail.
"name": "{{${first_name}}} {{${last_name}}}"
If a profile might not have data for a value, make sure to include a default. This is less important for string values, since the quotes will assign an empty string, but for boolean or numeral values, the JSON could be broken if there’s no value. Note that the way Liquid works, the default value with be rendered as false without any quotes.
"loyalty status": {{custom_attribute.${Loyalty Program Member} | default: 'false'}}
If you need to ensure that quotation marks, commas and line breaks are properly formatted in your message, you can use the Liquid {% capture %} tag instead of {% assign %}, since capture is better designed for verbatim text.
In the example below, you’re able to format the address as you might see it on a postal label using the capture tag and the “\n” notation that tells JSON where to place line breaks.
{% capture address_complete %}{{${first_name}}}
{${last_name}}}\n{{custom_attribute.${address_line_1}}}\n{{custom_attribute.${address_city}}}, {{custom_attribute.${address_state}}} {{custom_attribute.${address_zip}}}
{% endcapture %}
"address": "{{address_complete}}"
This would produce the following output for a test user:
"address": "Torchie McFlame\n742 Evergreen Terrace\nSpringfield, OR 12345"
Video Walkthrough
In the following video, learn how to build and personalize a webhook from a template.
You can also use BrazeAI™ Operator to help you customize a webhook template, or a custom webhook message, to your needs.